Saturday, May 3, 2014

Fired!

Letting pots warm up. 
What an amazing process.  This was done by ancient people in the 1300's and their's came out much better than mine.  I enjoyed the process and as a bonus I meet some interesting people.  I hope to attend more classes and go on some of the field trips.

Last week the class was cancelled due to wind.  Today it was predicated to be the hottest day of the year. 96 degrees.  Sitting in the sun and building a hot fire, wasn't too bad, as we started at 9AM and were done by 11:30.
Happily no pieces broke in the firing.

Already to hot to handle

Turning pots to warm both sides.  Hot work. 

Setting stones in the ashes to hold pots off the coals

Placing the pots. Andy wished he had brought his
welding gloves and metal tongs. 

Pots can touch. 

Air circulation is important.  

Stacking mesquite branches


Not the perfect fire.  Wanted it to all burn at once.  

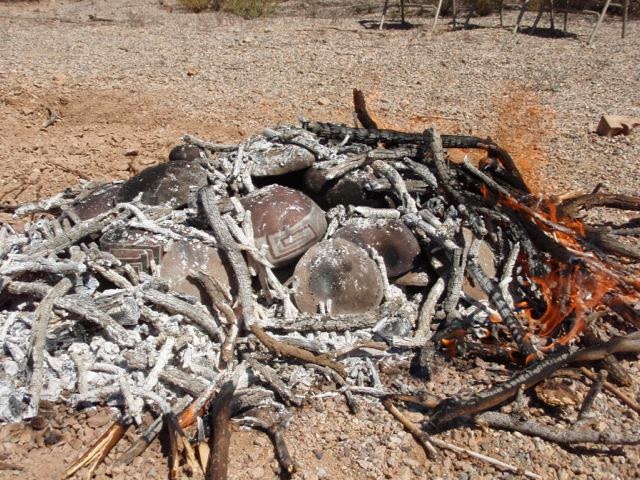
Because it wasn't a quick clean burn, some pots got
soot and ash marks. 

Waiting for pots to cool.  Can be pulled from the fire with
metal tongs.  Anything that can burn (like a stick will
mark the pot).

pieces pulled out by Andy.  "Garage Sale"


Checking it out. 


Paige's bowl.  White and blacks came out nice

Scott's bird pot.  The face is perfect

My pot.  The black is greyed out.  May have been the firing.
There are so many variables. 

Nice coloring. 


My puka with desirable fire marks. 
Finished pots.  Photo by Andy.

Sunday, April 13, 2014

Ancient Pot Creation - Day 2

Day two.  9 to 4:00PM with a half hour break for lunch.  While waiting for slips (color to dry), we made new pukis.  Here's an easy to read article on Salado pottery.

Curator's Choice: Brown Ware Perforated Plate

Used to create pots, acts as a wheel to turn the piece.

We fire in an open fire in two weeks.

Raw clay pot, polished with a smooth stone. Picture in
background of ancient pot. 


First coat of white slip.

first coat of slip almost dry

Yucca reed we were to chew
to make our own brushes.
mine didn't come out very well

Second coat of slip and new puki

Several coats of hematite.  When dry, polish with
smooth stone.  

Hematite on the bottom

Working on design, opps, small crack. 

Vegetal paint made of cooked down
mesquite beans. 

Working on design. 

Finished design, pot upside down, to
help it dry evenly.  


Link to design I was attempting to create: 

Here's a picture of the original pot, nice.

Saturday, April 12, 2014

Ancient Native American Pottery Replication Workshop

Decorated Wares of the 1300s

Great workshop focusing on pottery produced by Pueblo peoples in Southern Arizona between 1270 and 1450AD. Taught by Andy Ward, Southwest Pottery.  Held at: the Old Pueblo Archaeology Center

Interesting Links and Reading, from Andy
I will briefly cover the background of the pottery types we will be reproducing and the culture that produced them, but we won’t have time to go into too much detail. You may get more out of the class if you do some reading on the Salado and Kayenta beforehand, following are a few suggested sources.

Palatkwapi - Exploring the Lost Southern Pueblos


Here is a link to the map of some clay sources I talked about in class. These are not so much good body clays but colorful clays that might be used as a slip or as paint.   Google Maps

Handout.  


Locally collected clay

Clay needs to be ground up

Hardwork, plus dusty


Pounding chunks, to make grinding easier. 

Archeology center, with practice excavation site
used for teaching children. 
Sand collected from the wash and added to ground clay
four parts clay to one part sand. 

Mixing clay and sand.  Water needs to be added carefully
as it's quick to turn to soup. 


Hand mixing works the best


Creating pot bottom in a puki.  Using a piece
of gourd to smooth the clay

Edges scored and water added
to hold the coil

Second coil, rub in the coil on inside
and then the outsige. 

Finished pot, need to let dry (some) in a plastic bag,
then add slip colors.